
Milwaukee WI, US 53211
This article will go over using tools to help realistically lighten, whiten teeth in lightroom in post production. This can be useful for when you get back from a shoot and realize that the teeth are too distracting or not where you want them to be.
First off if you want to try this out on an image check out this photo to try out a photo with yellow teeth.
Unsplash Image
The first step to starting the process is creating a Brush selection over the image. This tool option in lightroom is underneath the Select Subject and Select object tool.
In the brush setting there are a few options. The settings I used to get a quick selection of the teeth is size 4.0, feather 13.3, flow 23 and density 83.
The size of the brush determines how wide the brush will be. The brush in Lightroom will always be a circular size. You can also adjust the brush using the bracket keys on both Mac and PC.
The lightroom feather option of the brush creates a blur effect on the brush. The larger number the softer the edges of the brush will be. The harder the brush the more cut the shape will be.
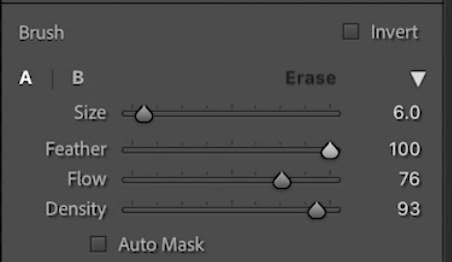
The next step is to use a cursor or a Wacom tablet to draw over the teeth. You can again adjust the size in the module or using your bracket keys.
When you begin clicking you may be able to see the selection from the color overlay. This can be changed in the bottom of the developer tab to adjust or not to see the brush selection.
You want to select the teeth area and make sure you get every bit of the teeth from the top to bottom even if all of it doesn't need to be fixed. You can change the flow later as well.
You also want to avoid getting too close to the upper lip and too close to the tongue or the inside of the mouth. Adjusting both of these would draw more attention inside the mouth that would not be necessary.
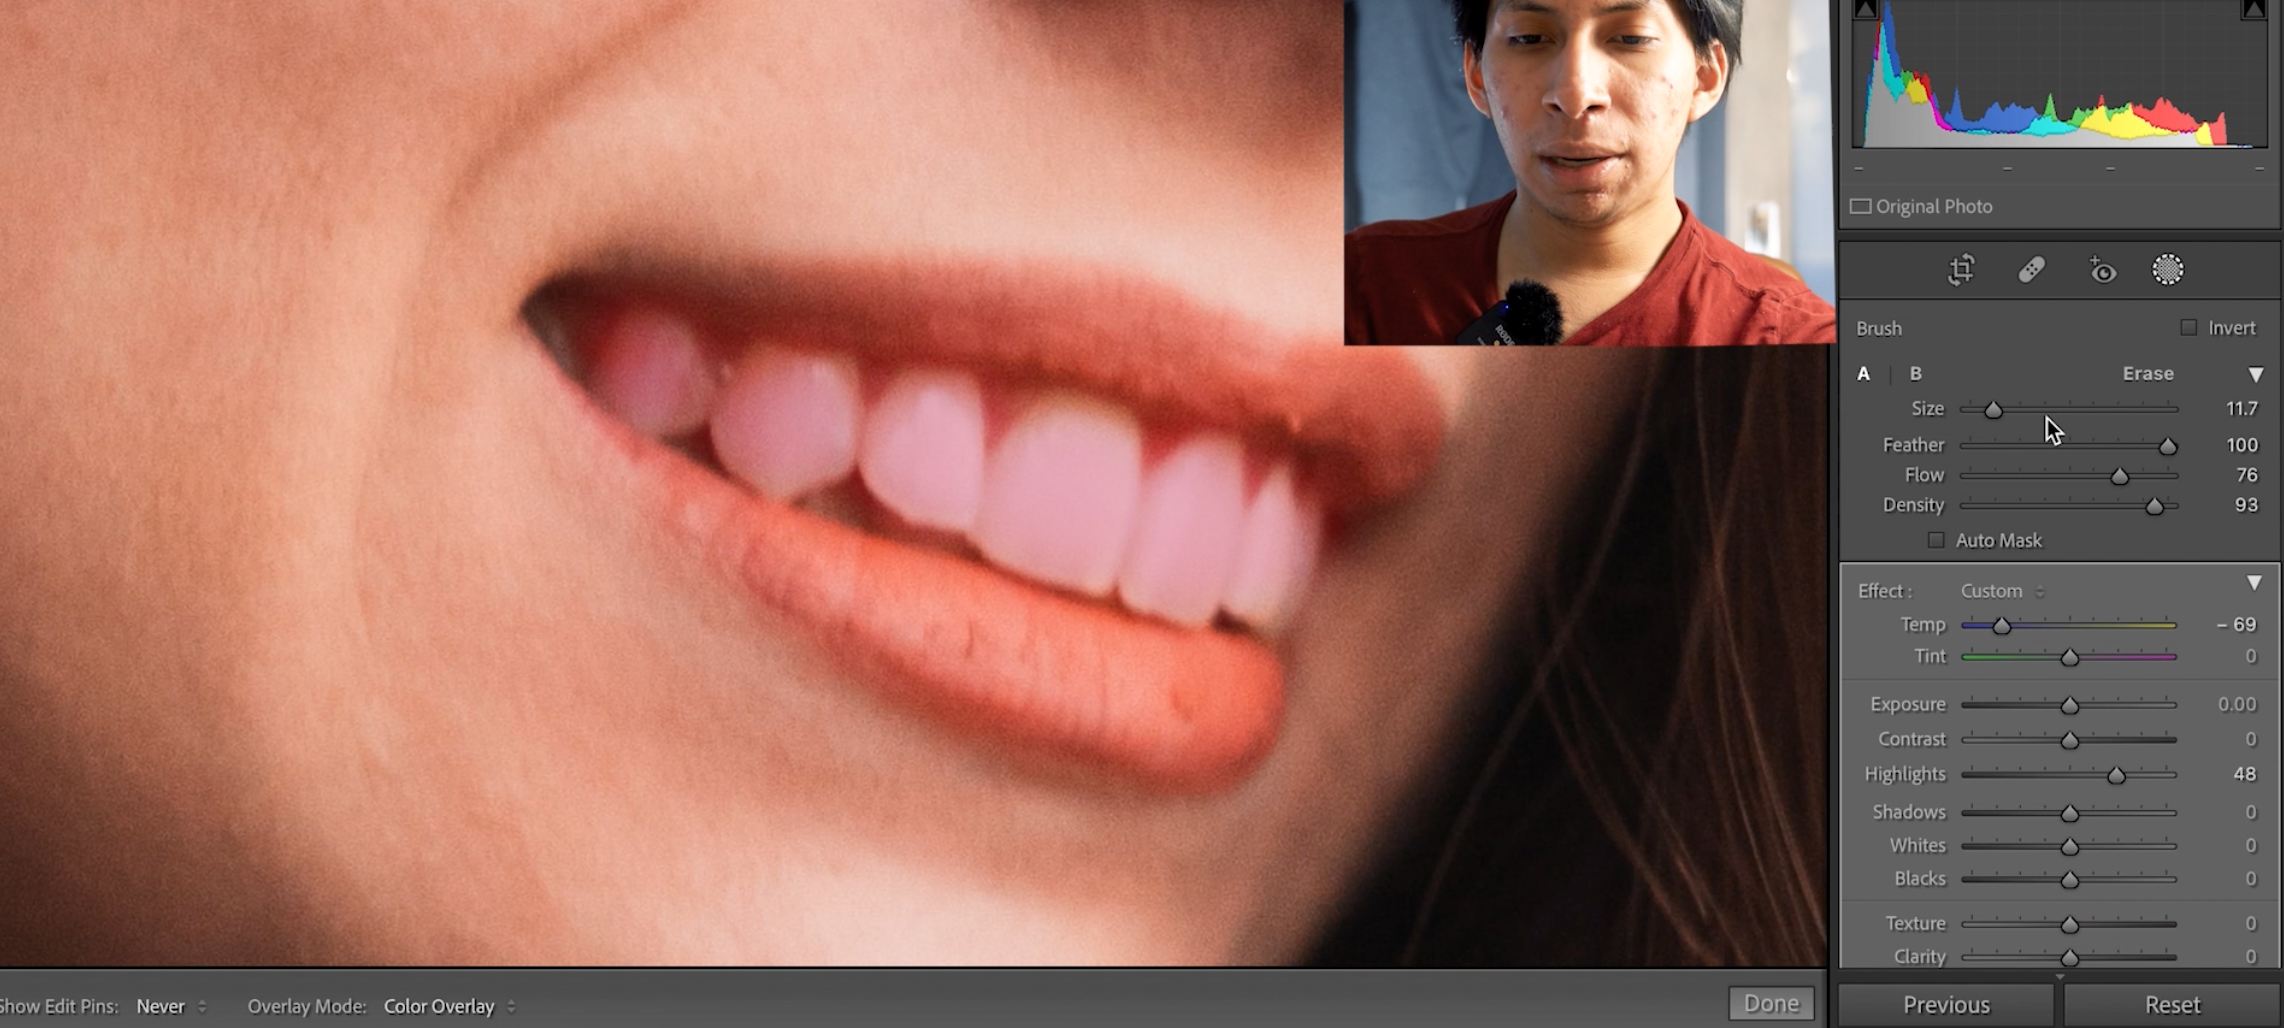
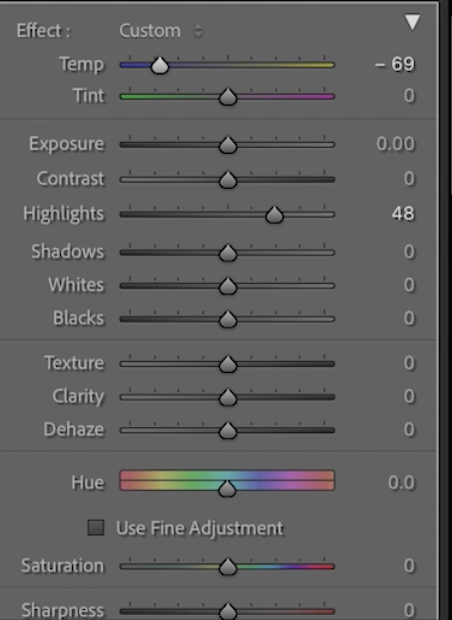
Avoid using the exposure setting for brightening up the photo. This will brighten the entire area of the photo and will create a stark contrast between your subject and your teeth.
Also avoid extreme values for the teeth such as low saturations at 0. This is also the same with the temperature that allows you to make the teeth bluer if you would like. This will create a color contrast between the subject and the teeth that will not look realistic
The way I would suggest is using the highlights. Using the highlights will bring out the brightness part of the teeth.
I personally like zooming out of the composition and looking further away from the image to see if the image looks realistic and there isn’t anything out of place.
Subtly whitening teeth is key and may take several times to adjust the highlights or other settings on your custom brush.
Mentioning helpful tools we have a few tools that can help you along your way in producing and post processing your photos in these cases.
Sometimes the portrait may be in a different color temperature than you had thought. Auto whitebalance or manually set white balance may be off. In these cases one handy tool is going directly to the outside part of the eye and selecting the color there. More than not the eye gives off a white color to humans with a hint here or there.
What you can also use to calibrate the color is using a white color sheet kit. These kits are fantastic for setting up a shoot and getting the correct white balance on your images. You can learn more about White Balance here.
Another helpful tool to help in Lightroom and Photoshop while using the brush tool is a drawing tablet. My personal tool that I used for years was the Wacom Intuos Pro. Today they have professional, reliable and user friendly Tablets to help you draw.
These tablets allow you the chance to use the brush as an actual brush. I would highly suggest getting a Drawing Tablet.
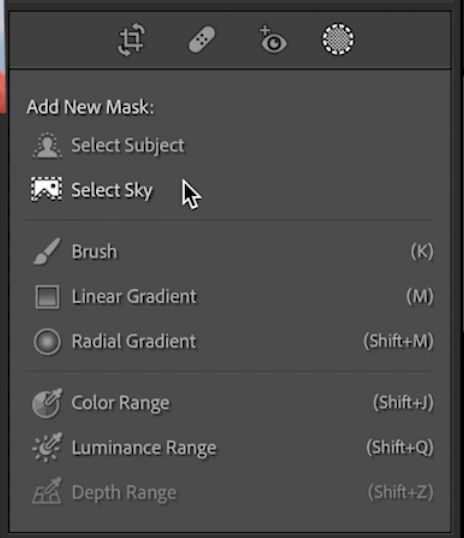
There is a time and place for both of these editing styles; the prior is your more standard edit. You want someone to not notice that your photograph was tweaked in a way where the teeth is white.
Prominent edits may be for creative campaigns or creative design. You may need the teeth to be the center of attention and thus add a tad more whitening to the teeth, this is modest at best. Other prominents edits may be more mild and divert attention directly to the teeth.
Both subtle and prominent edits can be used to help create their own unique look!

Instead of the teeth being dark and yellow you may have an overexposed teeth exposure. There are unique situations were the teeth may be brought out a lot more then you would like them to be. A few things you can do are the following
You can change the whites, this is best if you know that the area is a white spot but not bright enough to be fully white.
You can also look into changing the exposure by a selection via the brush. This can be helpful to bring down the entire exposure of that area without messing with different shadow and highlight values.
Yes! These editing tricks work perfect for eyeballs. However there are a few unique things you can do around the pupil that may be worth diving deeper into learning.
There is a toolbar that allows you to navigate at the bottom of the screen in the Develop tab. This is a fast and easy way to zoom in and out of your photo with the real quality in mind.
Right now I (Isaias) , am developing multiple articles on lightroom topics including how to use the dehaze tool, changing eye colors and brightening the eye. There are also numerous videos located on my YouTube Channel with further video tutorials.
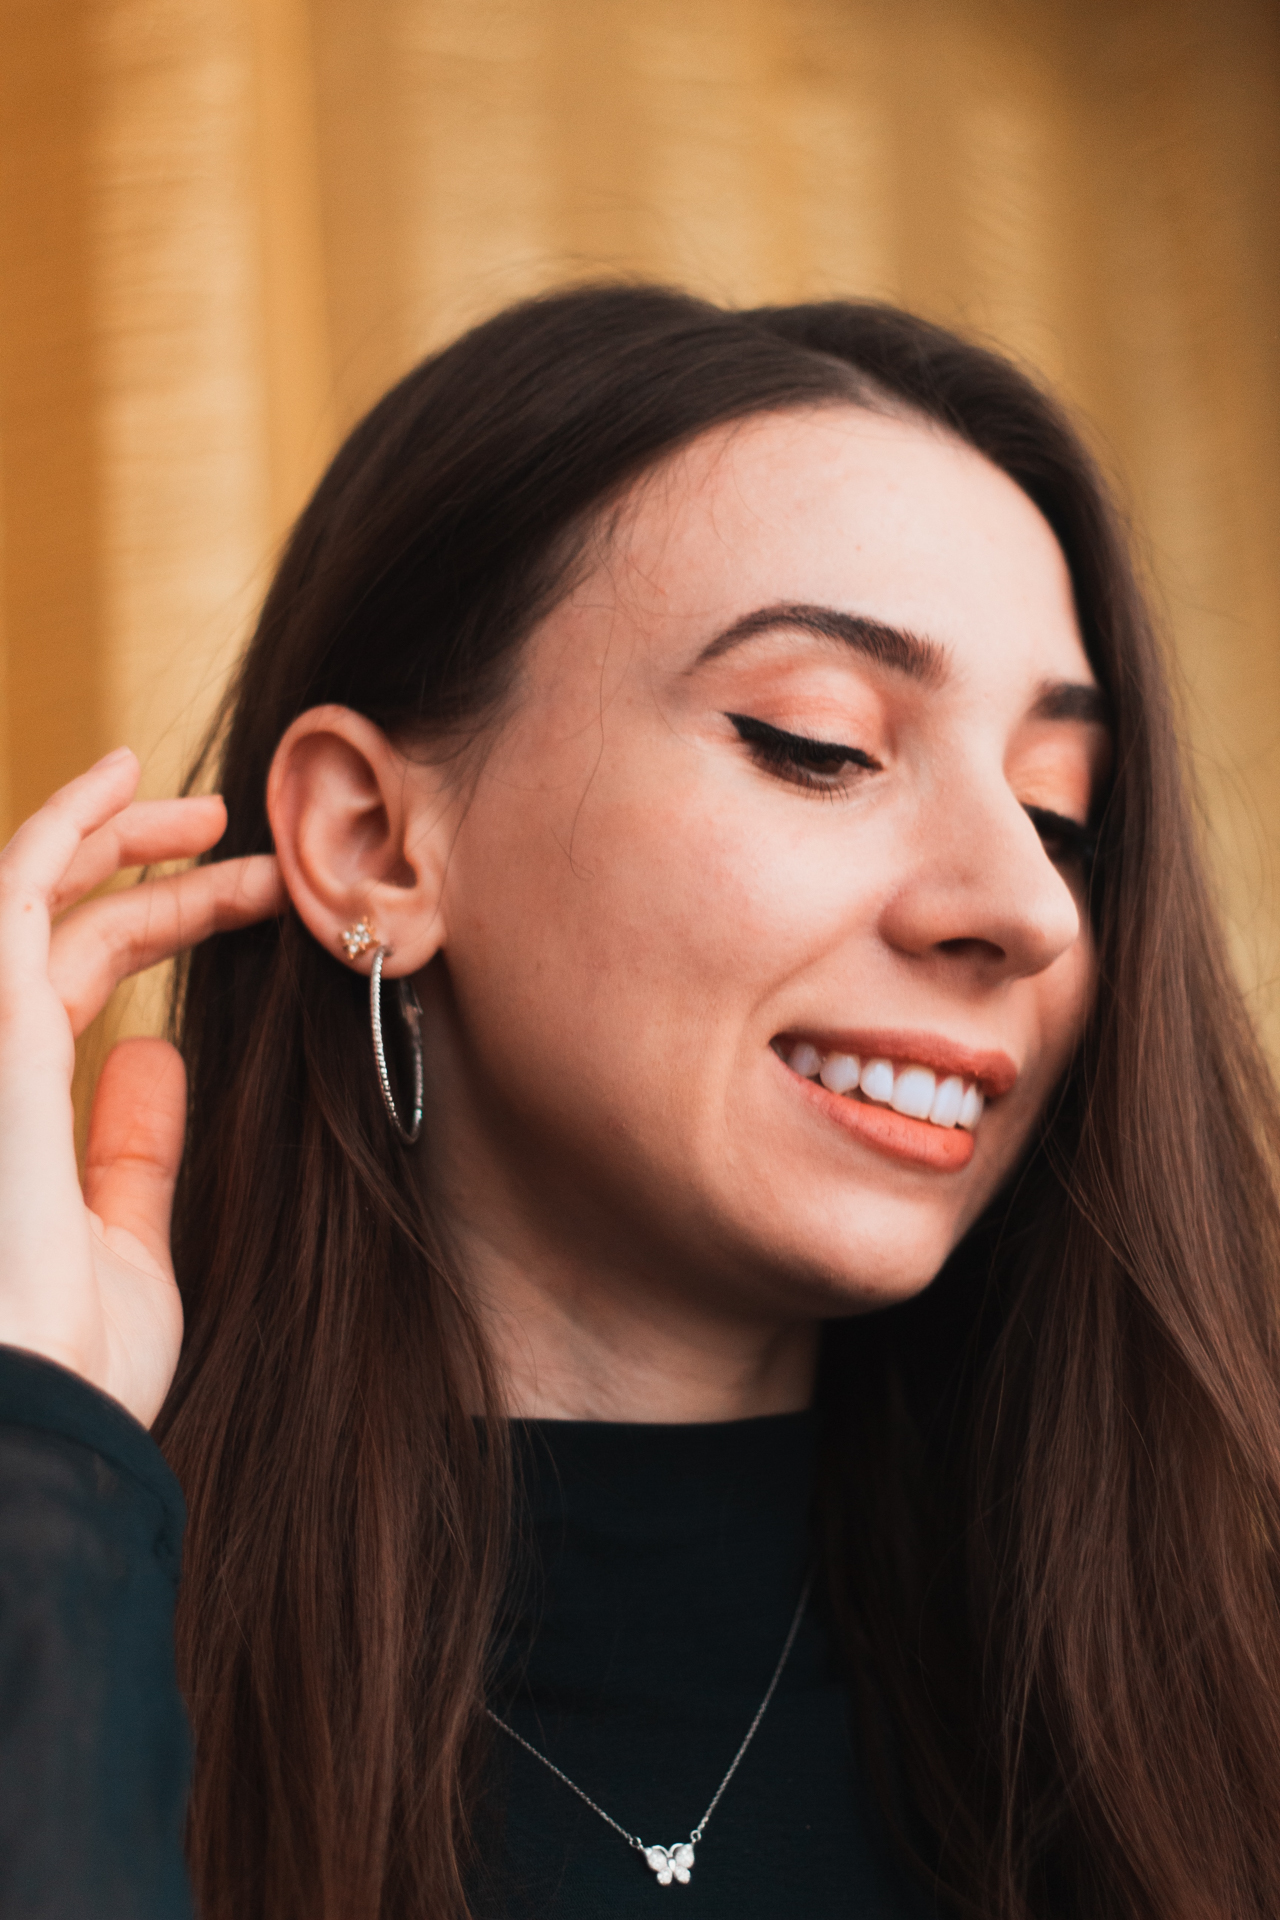
This article went over some of the processes of how to whiten teeth in Lightroom. Lightroom is a great program for portrait editing and in this case we were successful in whitening teeth.
We went through the brush tool and certain exposure settings to help the image look realistic. We also went through different editing styles and uses. Hopefully this video will help inspire and envision your next photoshoot.